This tutorial will show you how to debug Android application on a real Android-powered device (mobile phone).
Tools and environment in this tutorial :
- Eclipse IDE 3.7 + ADT Plugin
- Samsung Galaxy S2
- Windows 7
Summary steps to debug on device :
- Download Google USB Driver (if using Android Developer Phones (ADP))
- Download OEM USB Drivers (if using other Android-powered device, Samsung, Acer, HTC…)
- In your device, turn on USB debugging.
- Connect your device to the PC.
- Use “adb devices” to verify that your device is connected successfully.
- Change Eclipse “Deployment Target Selection Mode” to “Manual”, and select the device at runtime.
- Done.
In this example, we will use the previous “Hello World Android Example“, and debug or run on a real Android-powered device, Samsung Galaxy S2.
1. Download OEM USB Driver
Refer to this Android USB driver guide. If you are using Android Developer Phones (ADP) like Nexus One or a Nexus S, you should install the Google USB driver via “Android SDK Manager“.
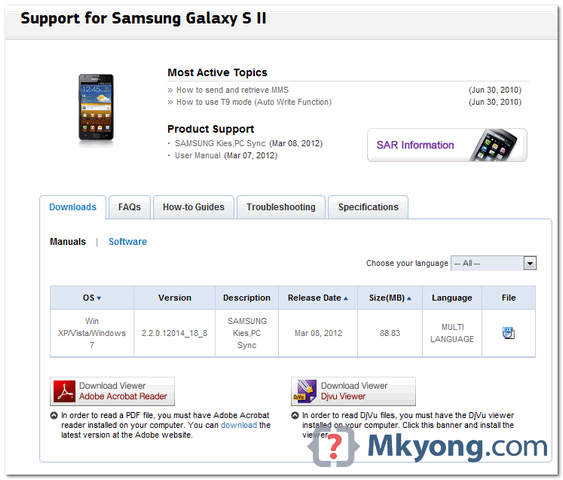
With Samsung Galaxy S2, you need to install OEM USB driver, or Samsung USB driver, which included in the Samsung Kies software.
Refer to this “where to download Samsung Galaxy S2 USB driver” guide to get USB driver install on your PC.
2. Enable USB Debugging
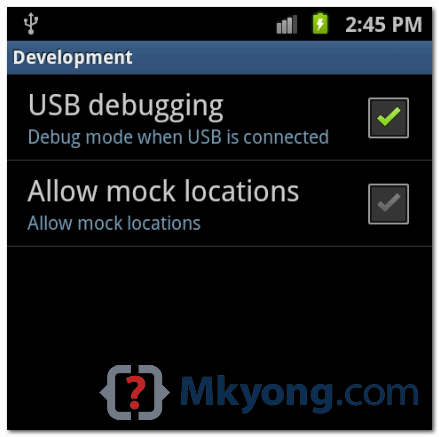
In your device, to turn on USB debugging : “Settings” -> “Applications” -> “Development” -> “USB debugging”.
See figure below :
3. Connect Device To PC
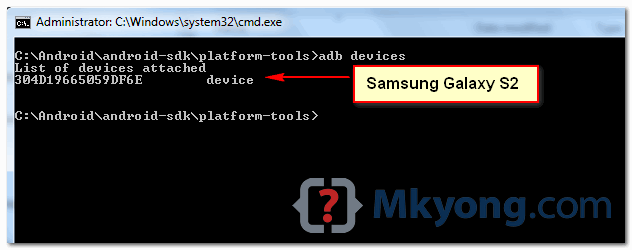
Connect Samsung Galaxy S2 to the PC, and verify it via command “
adb devices“.
In commmand prompt, change path to “Android SDK/platform-tools“, type command “
adb devices“, if you see something like “some-weird-number device“, it means your device is connected to PC successfully.
Figure – The “304D19665059DF6E device” is the Samsung Galaxy S2.
4. Eclipse -> Android
Note
Most people are stuck in this stage, beware.
Most people are stuck in this stage, beware.
Previously, you may created few “Android Virtual Devices (AVD)” for testing, and set “Deployment Target Selection Mode” to “Automatically“, however, this will caused the application failed to debug on your connected device and keep starting the AVD emulator.
2 solutions :
- In Eclipse right click on Android project, select “Run” -> “Run Configuration” -> “Android Application” -> “Target” tab -> “Deployment Target Selection Mode” -> set it to “Manual“, and you can select the device at runtime.
- Alternative, in “Deployment Target Selection Mode“, just deselect all the selected AVD.
Figure : Deployment Target Selection Mode
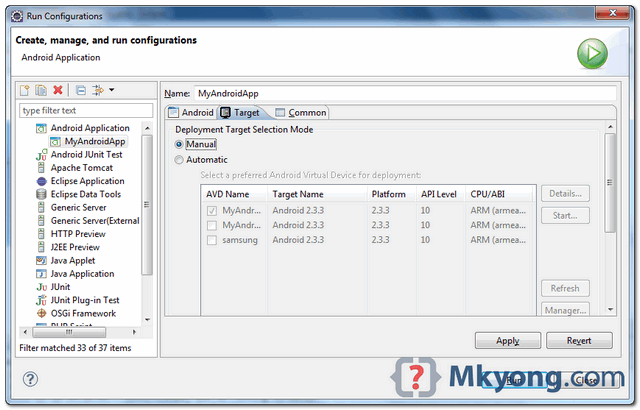
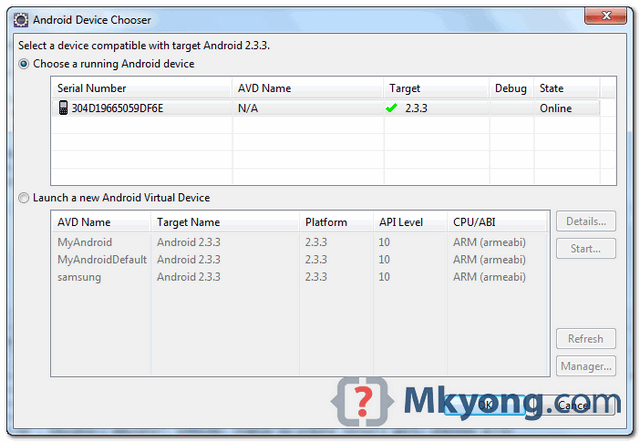
Figure : Select your device at runtime
5. Start It
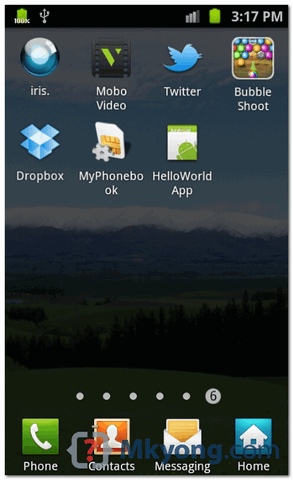
In Eclipse, run or debug your project as Android project, select your device at runtime and the project will copy to your Samsung Galaxy S2 and started automatically.
Figure : HelloWorldApp debugging on Samsung galaxy S2.

References
- Android developing on real device
- Android OEM USB driver
- Android debug on Samsung Galaxy S2
- Android hello world example
Thanks
akm
www.cdacians.com


No comments:
Post a Comment